Tuesday, June 8, 2010

Stars and Stripes Forever!


For beautiful, for spacious skies for amber waves of grain

Oh say can you see by the dawn's early light

I'm proud to be an American where at least I know I'm free and I won't forget the men who died and gave that right to me and I'd proudly stand up next to you and defend her still today 'cause there ain't no doubt I love this land God Bless the U.S.A.

Go ahead, you can sing along, I know you want to ... and it's safe, no one here is going to judge your singing! Just about every American is familiar with these patriotic lyrics and around the 4th of July they seem to hold a special meaning very near and dear to our hearts. We're proud to be an American company and hope that you enjoy our new collection of Patriotic products as much as we've enjoyed creating them for you!
Let's start with a fantastic Fireworks border, you're going to love it!Fireworks Border #401

Or how about these great Fireworks, in 3 different designs!
The first is our latest, July 4th Fireworks #15009C featuring all glitter papers.
The middle is a bit larger, our July 4th Die Cut #400 measures 4" x 5 1/2" and is great for a page title. Lastly our Fireworks #1 is a great combo of patriotic red, white and blue with just a touch of sparkle in the center!


It's easy to add sparkle to an invitation to a backyard B-B-Q or maybe to a layout celebrating all the fun your family has each year on the 4th...simply add one of two of our great new July 4th Words #15009 in sparkling red, white, blue and silver!


Don't forget these sparkling beauties either...

Of course I couldn't make up my mind and had to combine some of my favorites to complete a quick layout of my family on the 4th of July on a summer trip to Washington state.
I rarely use "white space' on my layouts, but with such a bold red and blue, combined with the sparkling glittered papers the white cardstock background seems to work. Sorry about the crooked scan, but look how surprised they are at how high this firework went...what a great moment to capture!


For a dramatic embellishment try combining a couple products! Here I layered the title July 4th on top of the Fireworks Border for a quick attention getter!

Play safe this 4th of July and have a wonderful time with your friends and family; I'll be watching the F-16 flyover and singing along as they play
God Bless the


Wednesday, April 28, 2010

Celebrate Spring!

Here in Arizona Spring arrives very early in the year, usually by April we're turning up the air conditioners and enjoying every moment outside that we can before the heat of summer arrives. Whether you enjoy the spoils of Spring in March or May you're sure to appreciate the new products we've prepared to keep your projects fresh and exciting...just like a beautiful Spring day!

We've created a new collection of chipboard embellishments featuring flowers and trailing leaves that you're sure to love...


Our Flower and Leaf Corner (#312-3) makes a wonder mini border and is sized perfectly to edge a 4" x 6" photo. The Journal Box (#312-4) along with the Accent piece (#312-2) are wonderful accent pieces for those spring projects. As cute as these guys are my personal favorite has to be the Flower and Leaf Border (#312-1)

and once I started to play with it, I couldn't stop and here's how it ended up for my layout!


Pretty cute huh, it's going to be perfect for my Disney Fairies page! I simply added some paint, my favorite shade of Stickles glitter and a selection of flowers that were on hand and the transformation was complete!
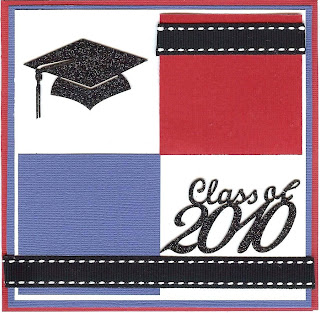
As much as I love the springtime flowers, I can't help but notice that my kids are counting down the days until school is out for summer. Which of course means that for the Class of 2010, graduation is close at hand! Don't worry graduates (or busy parents preparing for the big celebration), we've created a great line of new products in glittering black cardstock perfect for the big day.
Try our
Graduation Hats (#15008A)
Class of 2010 Fancy Titles
(#15008C)

Class of 2010 Plain Titles
(#15008B)

Graduation Words (#15008)

With just a few minutes and a couple of these great new products you can create a completely personal and unique card, announcement or party invitation!
Be sure to check out our website for a look at our complete collection of GRADUATION PRODUCTS , new items for SPRING and much, much more!

Monday, January 18, 2010

Love Is In The Air


It doesn't take a die hard romantic to appreciate Valentine's Day, you just simply have to share a little love with those around you! At my house you're more likely to find handmade love notes to my family accompanied with heart shaped strawberry pancakes than you are to find jewelry and roses (chocolates of course are always welcome)! This year our crew at Unique Pages can't wait for you to fall in love with our sweetest collection ever of Valentine products! We've brought you a great assortment of glittering embellishments, titles, and borders in sparkling red, pink, and white that we can't wait for you to sink your teeth into! I can hardly wait to get started using this collection of Valentine words (#15003). The variety of colors and the fun font style totally inspire me to create a layout all about those heart shaped pancakes that are now a Valentine's tradition! I'm always looking for a little something sweet to share with family and this year our new Oval Heart Combo makes the perfect gift! Grab a quick photo to place behind it and place the whole thing in a simple oval frame...voila! What could be sweeter than that? Now you just have to decide if you want the Large Heart Combo or the Small one!

The art of creating and giving a handmade gifts for Valentine's Day is an age-old tradition; whether you prefer the classic style of lace doilies or a more modern touch of bling and sparkle you'll love the four new borders we've designed just for this special holiday! Choose from our Heart Shaped Wide Border, our Heart Border with Love, an elegant Rose Border with Hearts, or the simple style of our Small Hearts Border. Of course as much as I love a brand new product line, sometimes it's nice to turn to some of your old reliable favorites to get a project done! Don't miss our entire collection of Valentine products at our website; trust me when I say it will be love at first sight!

Wednesday, November 25, 2009

Chrismas Is Coming!


Christmas is definitely on it's way and we wanted to share some of our favorite new products for the holiday season! Worried about shipping...don't be; we can have your order filled and shipped before you can decide which project you'll begin first!

Although there's not much of a chance for flurries here in Arizona, I plan to create my own little blizzard with some of our Snowflake products. We have new borders in both sparkling glittered white cardstock and chipboard, as well as a new Snowflake Corner design - so let it snow let it snow let it snow!

Although there's only that slim chance you'll see flurries in much of Arizona, it's pretty much a guarantee that you'll see these uniquely Arizona decorations as you take a drive down neighborhoods in the southwest...Saguaro cactus covered in Christmas lights! We couldn't resist creating one that you can add to everything from Christmas cards and letters to your holiday scrapbooks. Choose from either our multi-colored light design (#263) or our white lights design (#280) for your project - I'm hoping Santa tucks a few of each in my stocking!
Since Santa isn't the only one with a mile long gift list how about creating a whole collection of unique ornaments to give as gifts?
We've created a wonderful line of Chipboard Ornaments that are not only beautiful but so easy to finish! Make these little guys really special by adding some special embellishments...one of my favorite ways to embellish these is by spraying with Glimmer Mist and then highlighting special features with a touch of Stickles...you can complete dozens of these in an hour! You can even get the kids involved - let them decorate some of our Large Photo Ornaments for family and friends and then tuck a picture in for a one of a kind gift perfect for teachers and grandparents!
So grab yourself a hot cup of cocoa and settle down in front of your computer and check out all the new goodies we've added to the website...don't forget to peek in both the Christmas section (under Holidays) as well as our Winter section (found in Seasons) and get ready to 'have yourself a merry little Christmas".

Thursday, November 12, 2009

More for Fall


With Thanksgiving a week away, there's still plenty of time to get those creative juices running. Let these great Fall products inspire you to create projects for everything from the changing of the leaves, Thanksgiving, and don't forget Football and tailgating!Nothing beats dressing up a project with a quick border! Try adding one of these Leaf Borders (Product # 521, 522, 523) to a quick mini-album or card, or try what I did by making a quick Name Card for your Thanksgiving table! A simple pocket design with a slide out tag will allow each of your guests to write down what they are thankful for this year and will allow you to preserve those memories easier than ever!

One of my favorite new designs has to be this elegant Autumn Leaf Round Border, it's simple yet stylish design couldn't be easier to use. To embellish this one, try using an ink pad in natural colors to add a rustic feel. Feeling extra creative...venture into new territory and liberally spray with one of the new spray inks for an immediate transformation (we've tried Glimmer Mist, Walnut Inks, and Maya Road-all with EXCELLENT results!); embellish with glitter, bling, or try adding a little "Smooch" (a pearlized accent ink) to bring out the leaf details!

For all you crafters looking for a little flair, try adding our new Modern Leaves Chipboard design, it's perfectly sized for just about any project and couldn't be more versatile! Use it as a border, an embellishment or even as an oversized photo corner for that big family post-turkey portrait (don't you LOVE that idea)!

We're also very excited to introduce you to our newest chipboard alphabet design! Our new Script Alphabet measures just about 2.5" tall and 1.5" wide (depending on the letter) and so far is an all capitals alphabet. I love this design particularly for something special, like holiday celebrations or weddings; I can't help but think it's perfect for monogram designs and titles for a special layout!

Okay folks...are you ready for some FOOTBALL?! Where I come from Fall means Football; and Football means Friday nights at the High School game, tailgate parties, time with friends, and maybe a quick pick up game with the kids! So grab your favorite team sweatshirt, put your game face on and celebrate your love of the game with a quick mini album embellished with a few of our Mini Footballs. Aren't they cute...no wait, football can't be cute...aren't they're AWESOME (insert manly grunt here)! Cheer your favorite high school team on to victory with our Megaphone Mini Album combined with your school's monogram for a truly unique project!


Now how is that for some school spirit...each of our Chipboard School Titles are designed to work perfectly with the Megaphone Album as well as the 2" tall die cut varsity letters too! Somebody blow the whistle and let's play some football!

Tuesday, November 3, 2009

Thanksgiving Bracket Album

I tend to forget to take pictures on Thanksgiving. There, I admitted it...all that time preparing a beautiful table and a (hopefully) delicious meal is exhausting and in the midst of all the cooking, cleaning, and company, I tend to let myself get just a bit in over my head and manage to forget to capture a few pictures. Nothing inspires me more than when I have something cute in mind to put my photos in so this year I decided that planning ahead was the way to go!
I started by using one of our wonderful bracket albums (Bracket Album #3028)to create a fun Thanksgiving album. I plunged into my scraps, including cute stickers from Debbie Mumm and 7 Gypsies, my favorite papers from Scenic Route and some Bazzil Cardstock along with a handful of flowers and brads and I was on my way.
The first pages start showing my use of repetition in this little album. Both pages incorporate a striped paper, orange cardstock, a touch of brown and just a small accent or 2 (which happen to draw upon the triangle rule to add interest). The flower accent is cut from one of the patterned papers and then I added a fun brad to add a little "pop".

I love how the next 2 pages look complex but are really so simple: one paper for each background, and one photo mat. The page on the left has a strip of the patterned paper from the right and then they each get a single sticker and then the leaves and a few little flowers.

I'm sure by now you're starting to see a "simplicity" theme here! Each page again has a single background paper, with large photo mats. The mat on the right goes completely across the page, I added just a small strip of orange to the top and bottom to help make my sticker border stand out. Other than that each page was given some brown ink and a few stickers. (Why can't they all be this simple...wait...they CAN!!)

We're more than half done now...these pages use the flowered paper that I cut my flower accents from. Using a little white on the left hand page made all the difference letting these darker fall colors feel much lighter and then of course connected it visually with the opposite page.

I decided to utilize a couple of the quote stickers on the last pages. One of my favorite things to do with a square or rectangle sticker is to add a thin mat around it's edge in a contrasting color, then mat that with a color that compliments the page. Here both quotes are matted in a white (one cardstock and one the striped paper) before adding an orange mat, and then the quote on the right is added to one of the brown cardstock squares for a triple mat effect. Again, everything is touched with a bit of brown ink (one of my favorite things).
The back cover couldn't be easier, just a big sticker double matted and accented on the corners with a touch of whatever I had left on the table when I was finished!
With the mini album finished, now I'll feel like I can't possibly skip taking pictures this Thanksgiving...if you think the project is cute now, just imagine it filled with the faces of your friends and family!
Can't squeeze out a couple hours to complete this project, there's always our cute Turkey Album Kit #3028T that you can add your photos to quicker than you can say gobble gobble gobble!

Halloween Layouts

As I recover from the late night and the sugar coma that always seems to accompany October 31st, I have to admit that if I don't get my Halloween pictures scrapped right away...well let's face it, they'll have to wait until next year! I made a couple quick and easy layouts that I thought you might find helpful in getting those Halloween pictures off your memory card and into your albums!

The first one is great to show off your kid's costumes, or just to showcase some of the Trick-or-Treat fun you have on Halloween night! Here's a list of the things you'll need to recreate this layout:
2 12 x 12 sheets black cardstock (or one full sheet and one scrap 5" x 10")
1 12 x 12 sheet in each: orange, and purple cardstock
2 Corner Spider Webs in Black #782
1 Trick or Treat Border in Black #730

Starting with the black cardstock as my background, I trimmed the orange cardstock down to 11 3/4" x 11 3/4" so when layered we get a nice sense of dimension. At the base of the layout, add the Trick or Treat border centered on the page. Now we'll need the purple cardstock cut into 3 pieces each measuring 3" x 4 3/4", these will be our photo mats. To back the purple, we'll need a piece of black cardstock cut 5" x 10". Adhere the 3 purple pieces to the black mat background. When you add your photos, you have a number of possibilities; try a single "panoramic" style measuring 9 1/4" x 4 1/2", 2 photos each measuring 4 1/2" x 4 1/2", or 3 photos measuring 2 3/4" x 4 1/2". Lastly add the spider webs into each corner, about 1/4" inside the edge of the orange cardstock. There you have it, the first one's done!

Okay, for the second layout, I decided to add a little sparkle to my page using glittered accents and just a touch of "bling"! To complete this layout you'll need the following:
1 12 x 12 sheet purple cardstock (or a scrap 12" x 1 1/2")
1 12 x 12 sheet light green cardstock
4 glittered pumpkins of your choice ( I used # 606GGL, 606FGL, 606EGL, and 606CGL)
1 Ivy Border in Black #418
1 Ivy Border in Black #418-12
1 Chipboard Border #6119
24 flat backed rhinestones (12 orange, 6 purple and 6 green)
Black acrylic paint
1 Inch foam brush

Begin by painting the Chipboard Border black using a little acrylic paint and your foam brush. We always recommend that you purchase a good quality acrylic paint such as Americana or Delta, these have a lower water content and will not buckle your chipboard like some of the more inexpensive paints tend too. Remember to get a good coating on the top and to get the sides as well. If you'd rather skip the paint, you can always use a good black ink pad to transform your chipboard border, just press the border directly onto the ink pad! Set the border aside to dry.
Time add the purple border to the top and bottom of the green. Cut 2 strips of purple to measure 12" x 3/4" each, glue these to the bottom of the page. When the chipboard border is completely dry, glue it to the top of the purple cardstock strip overlapping by about 1/4". The Ivy border is next, the smaller one belongs in the upper left hand corner, just below the chipboard border and just inside the edge of the page. Add the larger Ivy Border by starting in the lower right corner, again just above the chipboard border. The longer border will reach nearly from edge to edge. Now it's time to assemble and add those glittering pumpkins (check out our last blog post for helpful instructions). 2 will be placed in the upper right hand corner adn 2 in the lower left hand corner. Lastly using a good craft glue or glue dots, add the rhinestones to really add some sparkle. Now just grab a few of your favorite Halloween or Pumpkin Patch photos and you're all set!
I don't know about you, but just getting these 2 layouts completed and into my albums makes me feel pretty darn good! Now we can start to tackle our Thanksgiving and Christmas projects...so are you ready?!